How to install in Penpot
Choose how you want to install:
Option 1 — Free hosted version
We host the plugin for you. No local build required. Add it in Penpot using the manifest URL below.
- Open Penpot and go to a project.
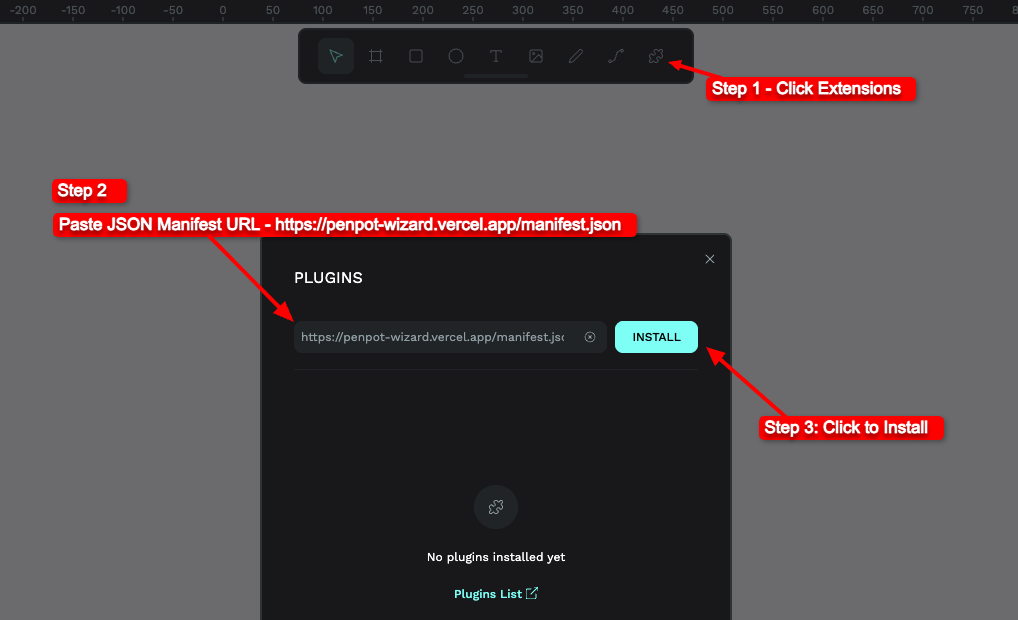
- Step 1 — Click the Extensions icon (puzzle piece) in the top toolbar.
- Step 2 — In the PLUGINS dialog, paste this manifest URL in the input field:
- Step 3 — Click the INSTALL button.
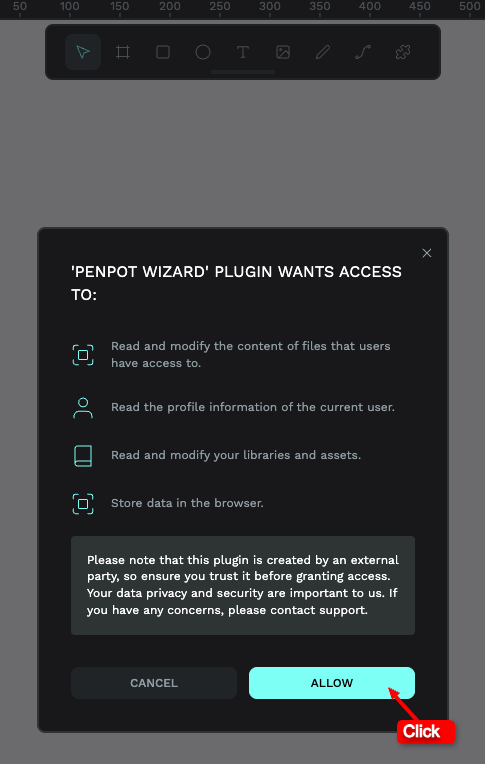
- Step 4 — When Penpot asks for permissions, click ALLOW. The plugin needs access to read and modify your project content, user profile, libraries, and browser storage to create and edit designs from the chat.
Option 2 — Host it yourself
Clone the repository, build the plugin, and load it in Penpot from your local dist folder (or deploy the build to your own URL and use that manifest). Full control and no dependency on our hosting.
After the plugin is installed (either way), open it from the Plugins menu. Then add your OpenAI or OpenRouter API key in the plugin settings to start using it.
Your API credentials are stored locally in your browser only. We do not store or have access to your credentials in any case.